What is Webpack, what is it for and how to use it.

Webpack is a module bundler for modern JavaScript applications. What does this mean? Well, many things. In summary, webpack converts modules with dependencies into files that the browser can understand in a faster and more interoperable way. Before breaking down this definition a bit more, let's look at the following diagram.
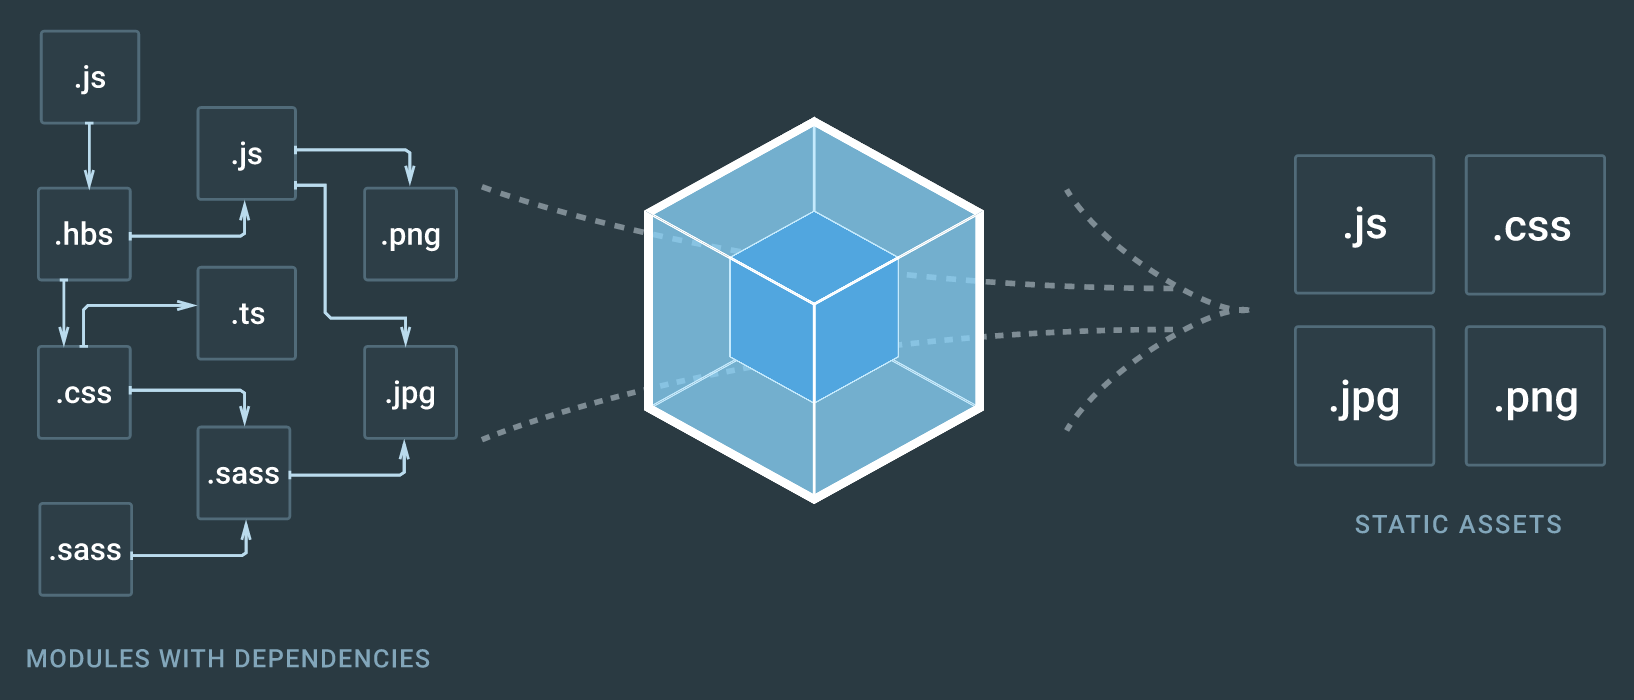
For developers, it is much more convenient to work with separate files and a modular architectural design. As you can see in the previous diagram, it is common for a web application to contain plain CSS files, preprocessor files like Saas or Less, TypeScript files, among others. Webpack will help us transpile all these files and deliver them to the browser so that it can understand them.
On the other hand, it is also important to consider performance in a web application. For this, webpack can generate a minified and/or obfuscated version suitable for the production system. Now, as you know, browsers can sometimes be slow to implement the latest functionalities in JavaScript and CSS specifications. Well, Webpack will also help us transform that modern code into code that can be read by different browsers.
Installation
If you have made it this far, you probably already have Node.js installed on your machine and a project in which you want to implement Webpack. If not, or if you want to learn how to install it anyway, you can create a new project in Node with the following command:
npm initAfter setting up your project, you can install webpack with the following command.
npm i webpack --save-devOnce this is done, you can verify the version you installed by following this command: From version 4 of Webpack many things have become more efficient from the console, which is why we are also going to install the following dependency.
npm i webpack-cli --save-devOnce this is done, you can verify the version you installed as follows:
# npx webpack -v
8.3.1
Integration
Well, we are just one step away from having Webpack in our project. To make this interesting, we are going to create the following HTML file (index.html) in the root of the project.
<!DOCTYPE html>
<html>
<head>
    <title>My page</title>
</head>
<script type="text/javascript" src="app.js"></script>
<body></body>
</html>
Also, let's create a JavaScript file (main.js) in the root of the project.
window.onload = function() {
   document.querySelector('body').innerHTML = '<h1>Hello World!</h1>';
}
Did you notice that the file we created is called main.js and the one in the HTML is called app.js? Well, app.js will be our production file that we will generate like this:
npx webpack --entry ./main.js --output ./app.js --mode productionYou will get an output similar to the following:
Hash: 494c204095c37670cbd9
Version: webpack 4.44.2
Time: 592ms
Built at: 09/28/2020 9:11:44 PM
 Asset        Size  Chunks             Chunk Names
app.js  1020 bytes       0  [emitted]  null
Entrypoint null = app.js
[0] ./main.js 99 bytes {0} [built]
Once this is done, you can enter the index.html and see the result in the browser. If you want to generate a development version, just change the mode like this
npx webpack --entry ./main.js --output ./app.js --mode developmentConfiguration
As you noticed earlier, executing the command to generate project assets can seem a bit long. That's why Webpack accepts a configuration file called webpack.config.js with which we can achieve the same result.
const path = require('path');

module.exports = {
    entry: path.resolve(__dirname, '.') + '/main.js',
    output: {
        path: path.resolve(__dirname),
        filename: 'app.js'
    }
}
With this, it is only necessary to execute the following command in the console and we would get the same result.
npx webpack --mode productionNow, we could go a little further and make running these commands even easier by adding two scripts to the package.json file.
"scripts": {
  "prod": "webpack --mode production",
  "dev": "webpack --mode development"
},
Finally, it's just a matter of running the following command if you need to generate assets for development.
npm run dev